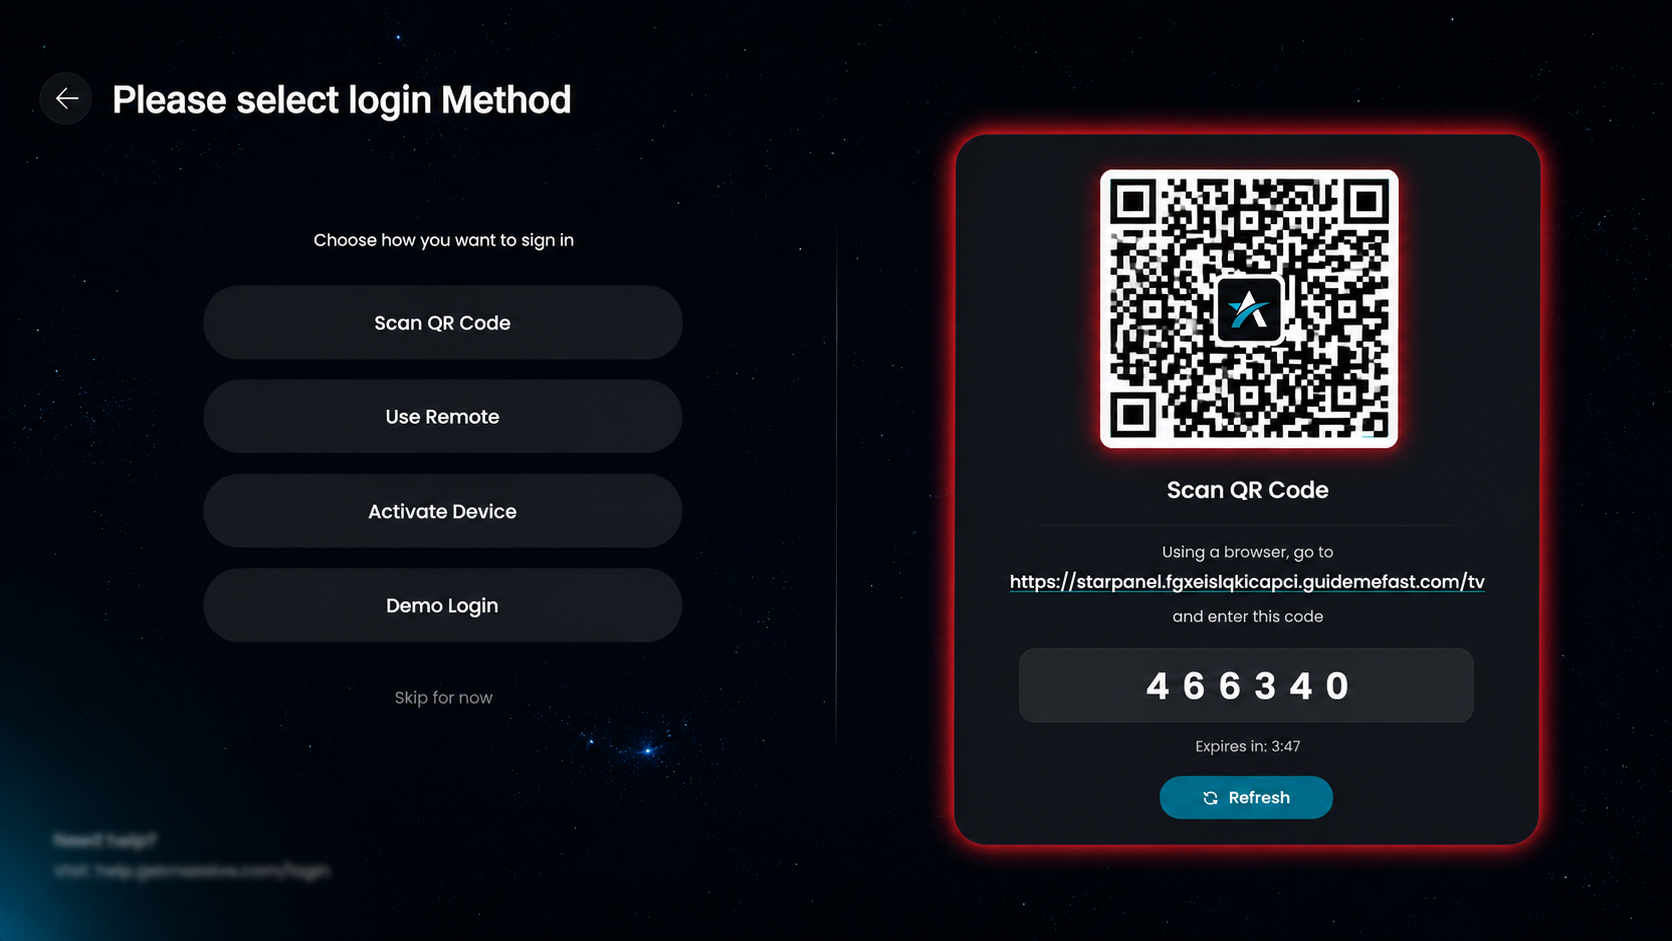
On the login screen, click on the Scan QR Code option.
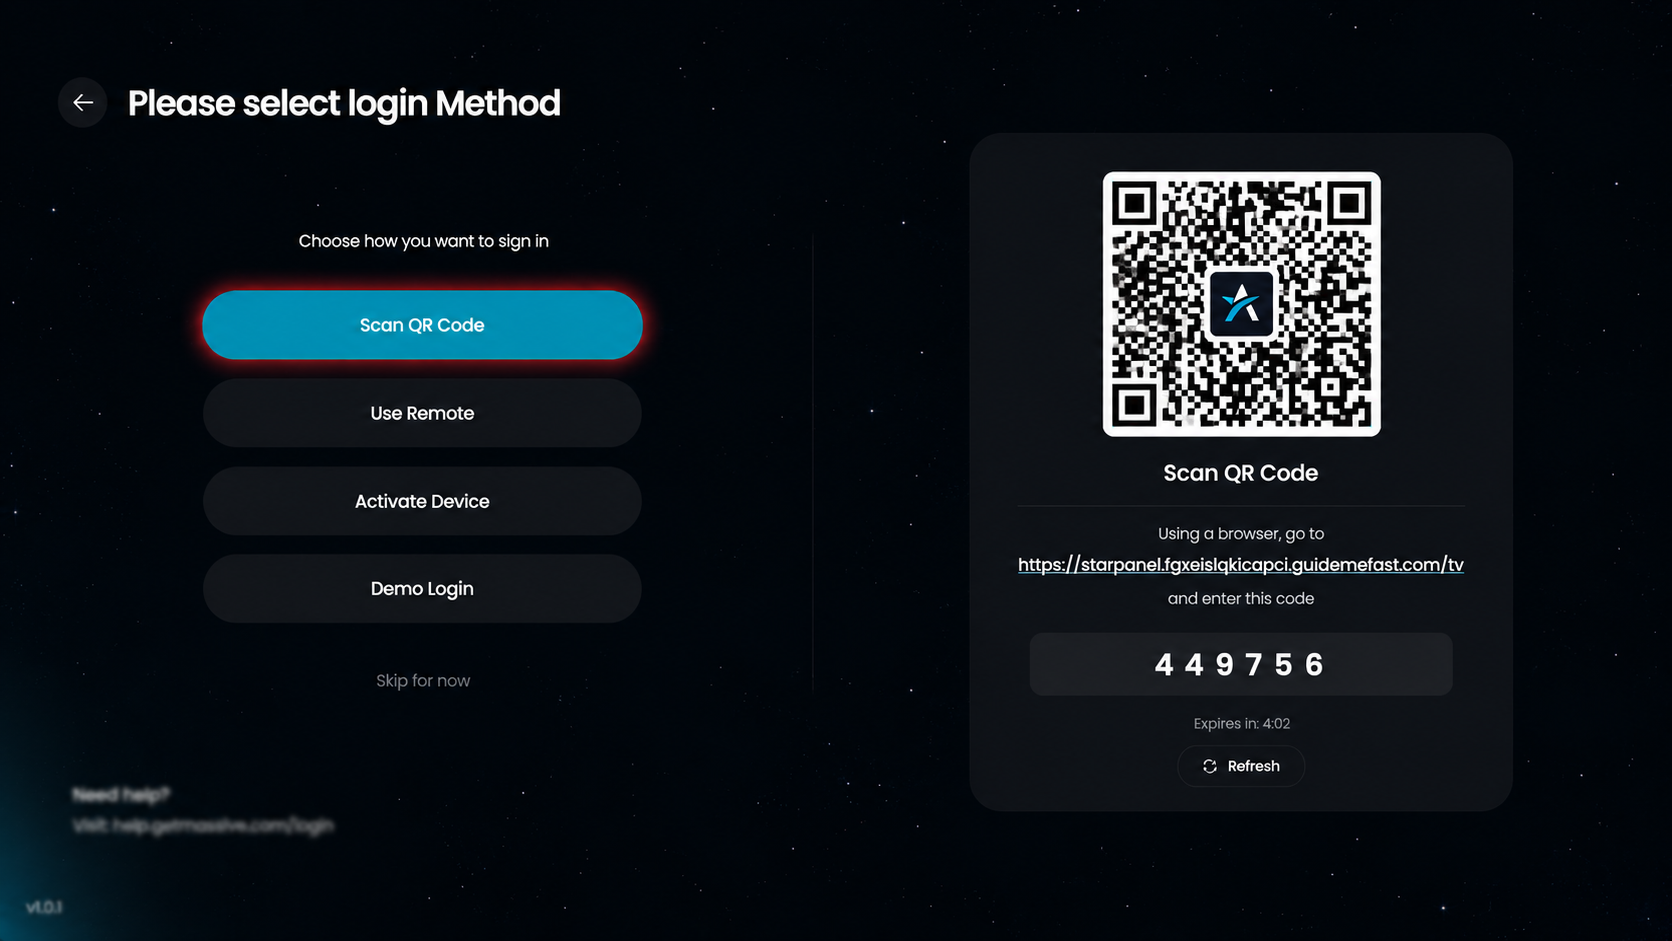
Use your mobile device to scan the QR code displayed on the screen.
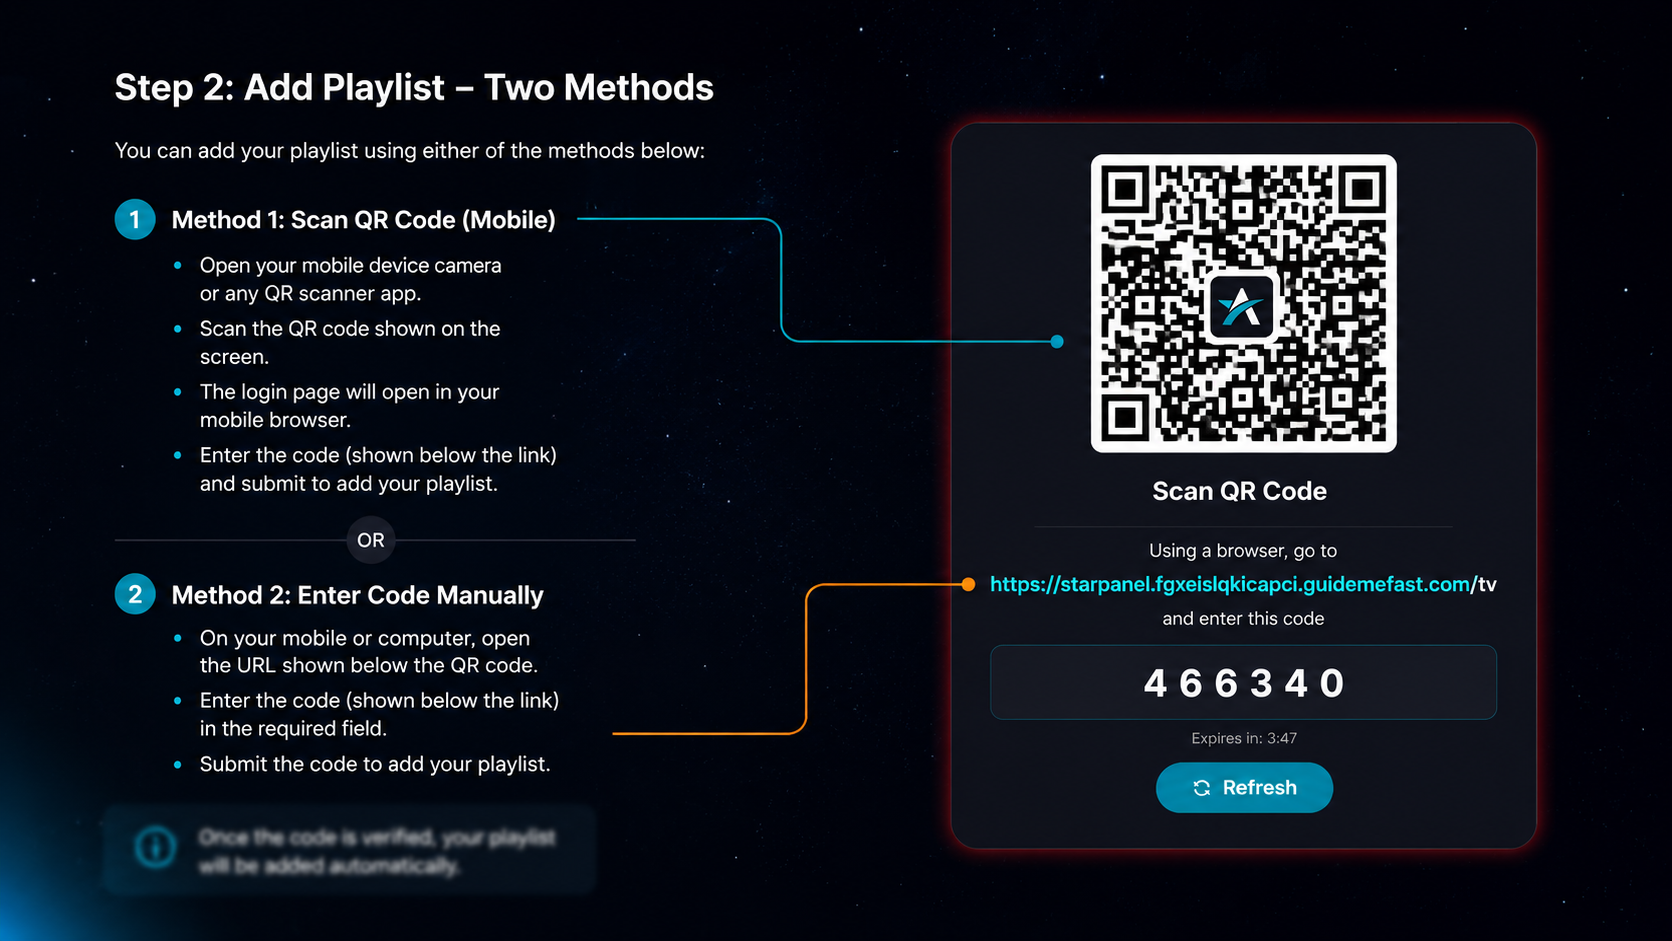
You can add your playlist using either of the following methods:
Open your mobile device camera or any QR scanner app.
Scan the QR code displayed on the TV screen.
A login page will open in your mobile browser.
Enter the code shown on the TV screen (below the link).
Submit the code to add your playlist.
On your mobile or computer, open the URL shown below the QR code.
Enter the code displayed on the TV screen in the required field.
Submit the code to add your playlist.
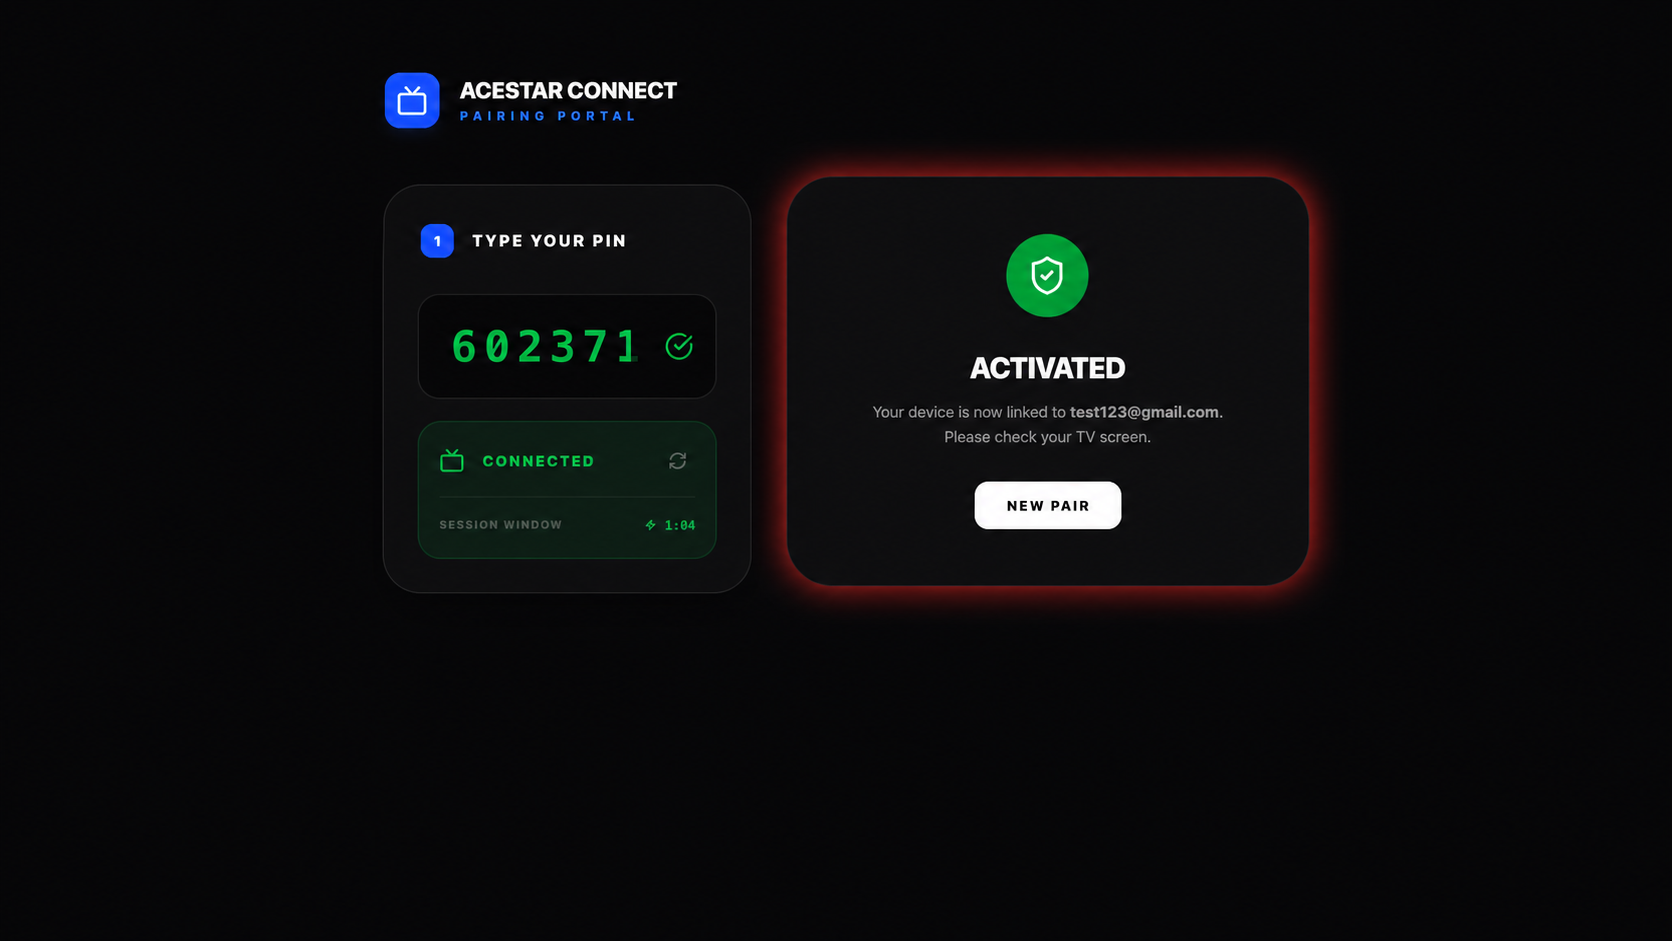
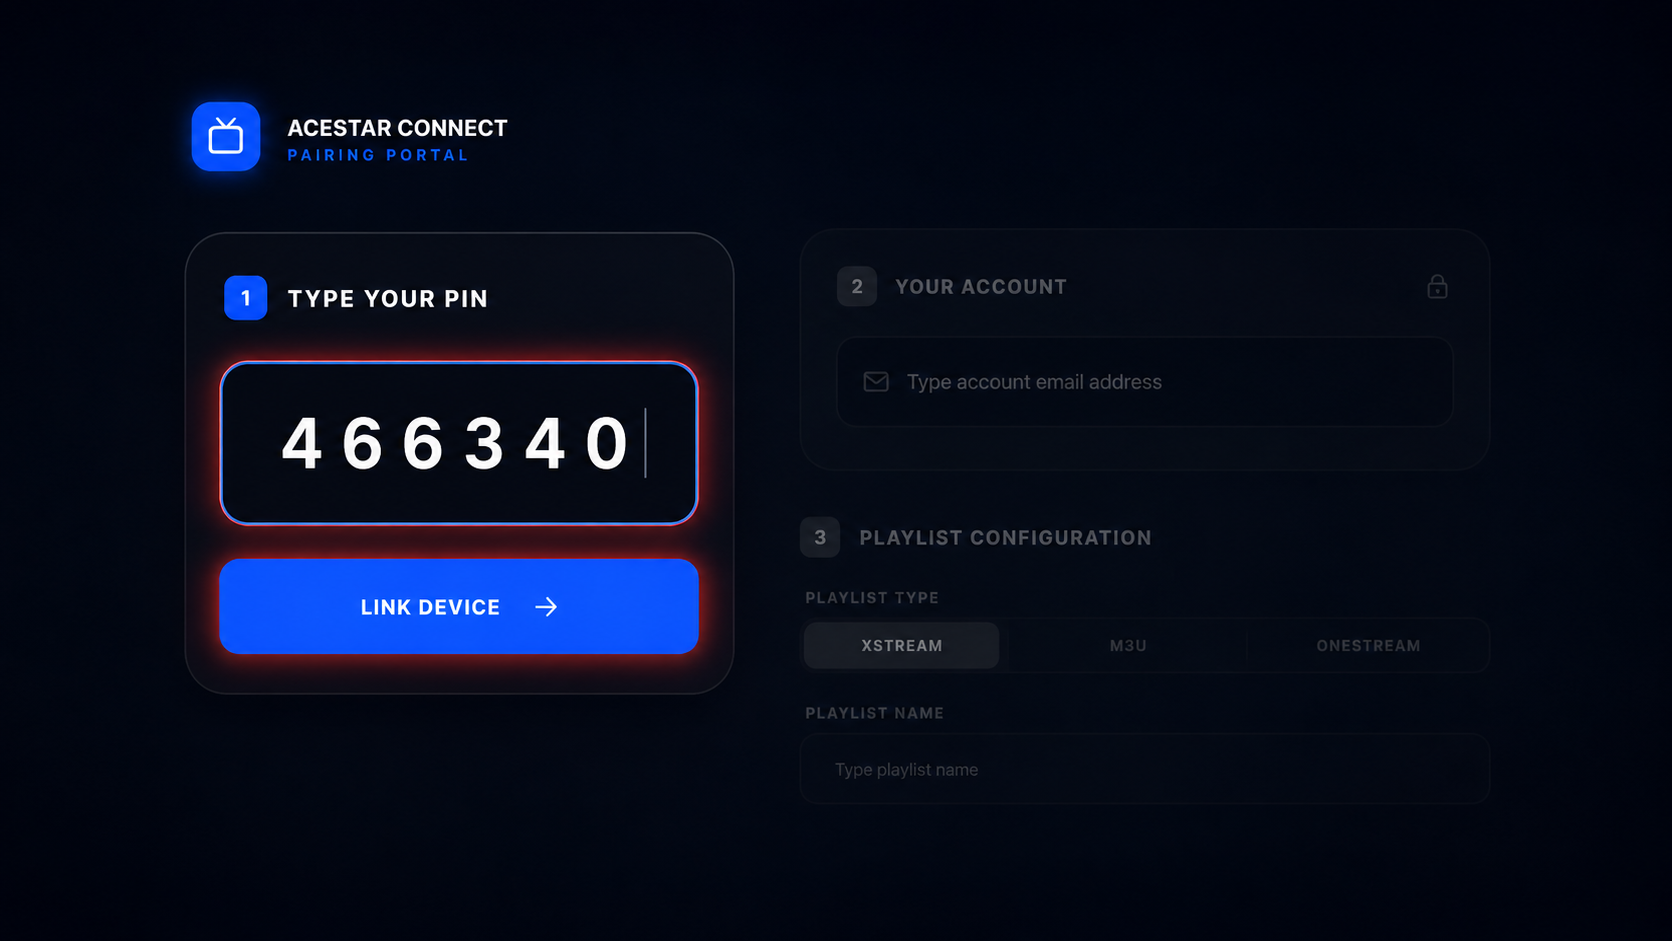
Enter the code displayed on your TV screen into the PIN input field.
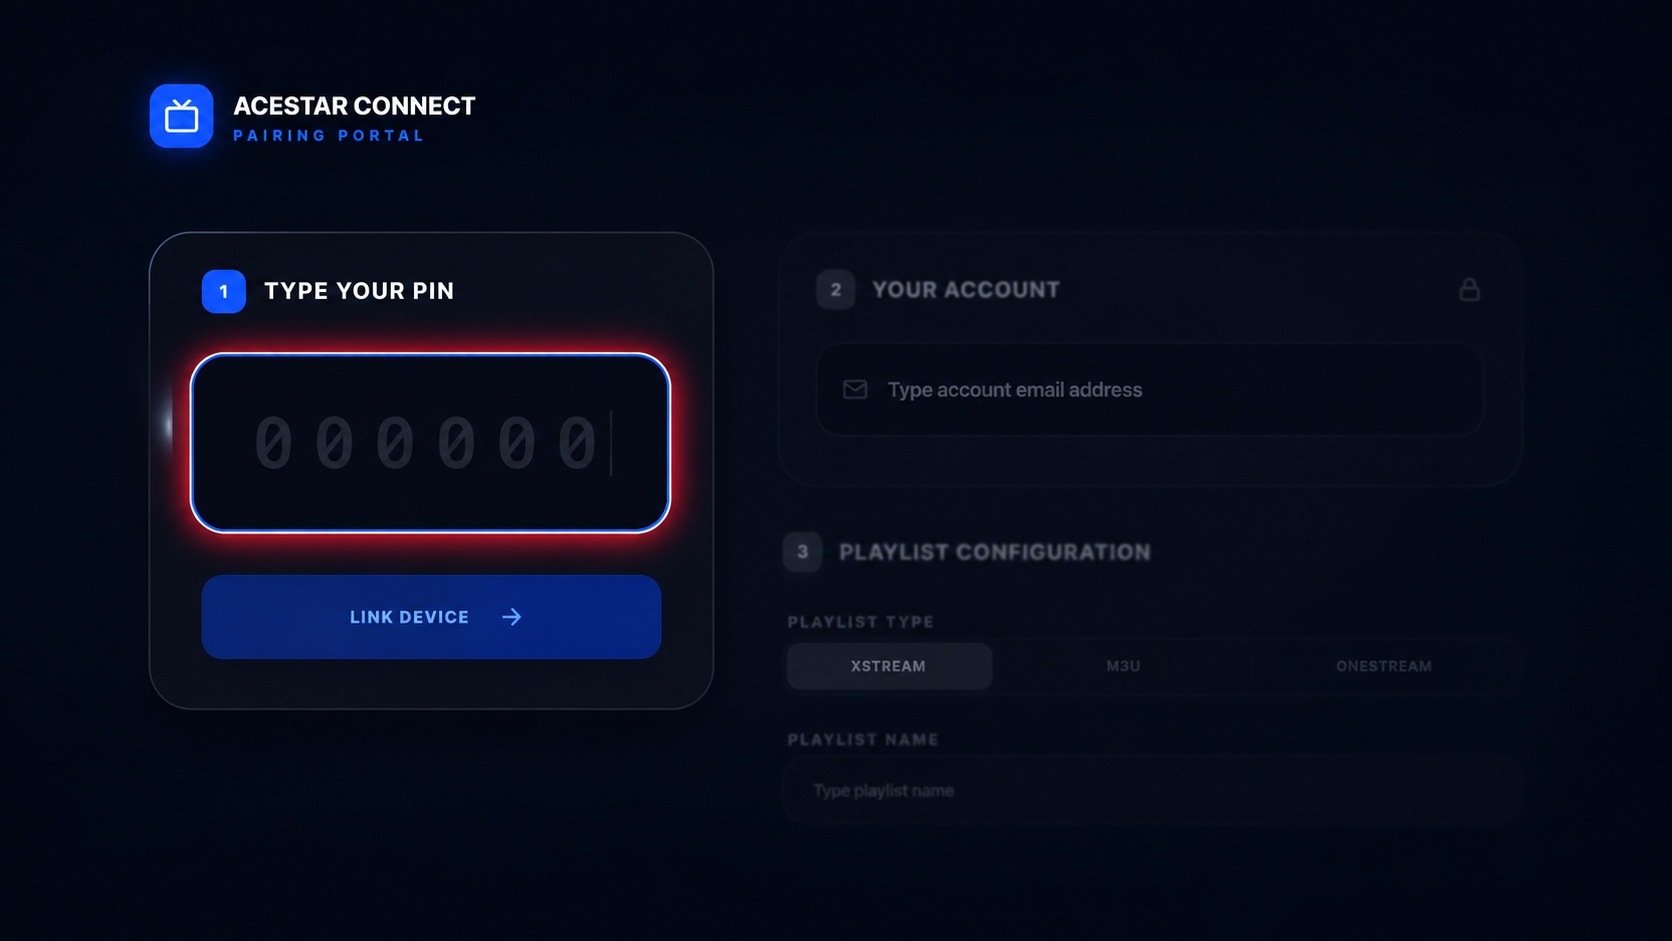
After entering the PIN, click the “Link Device” button to connect your TV to the portal.
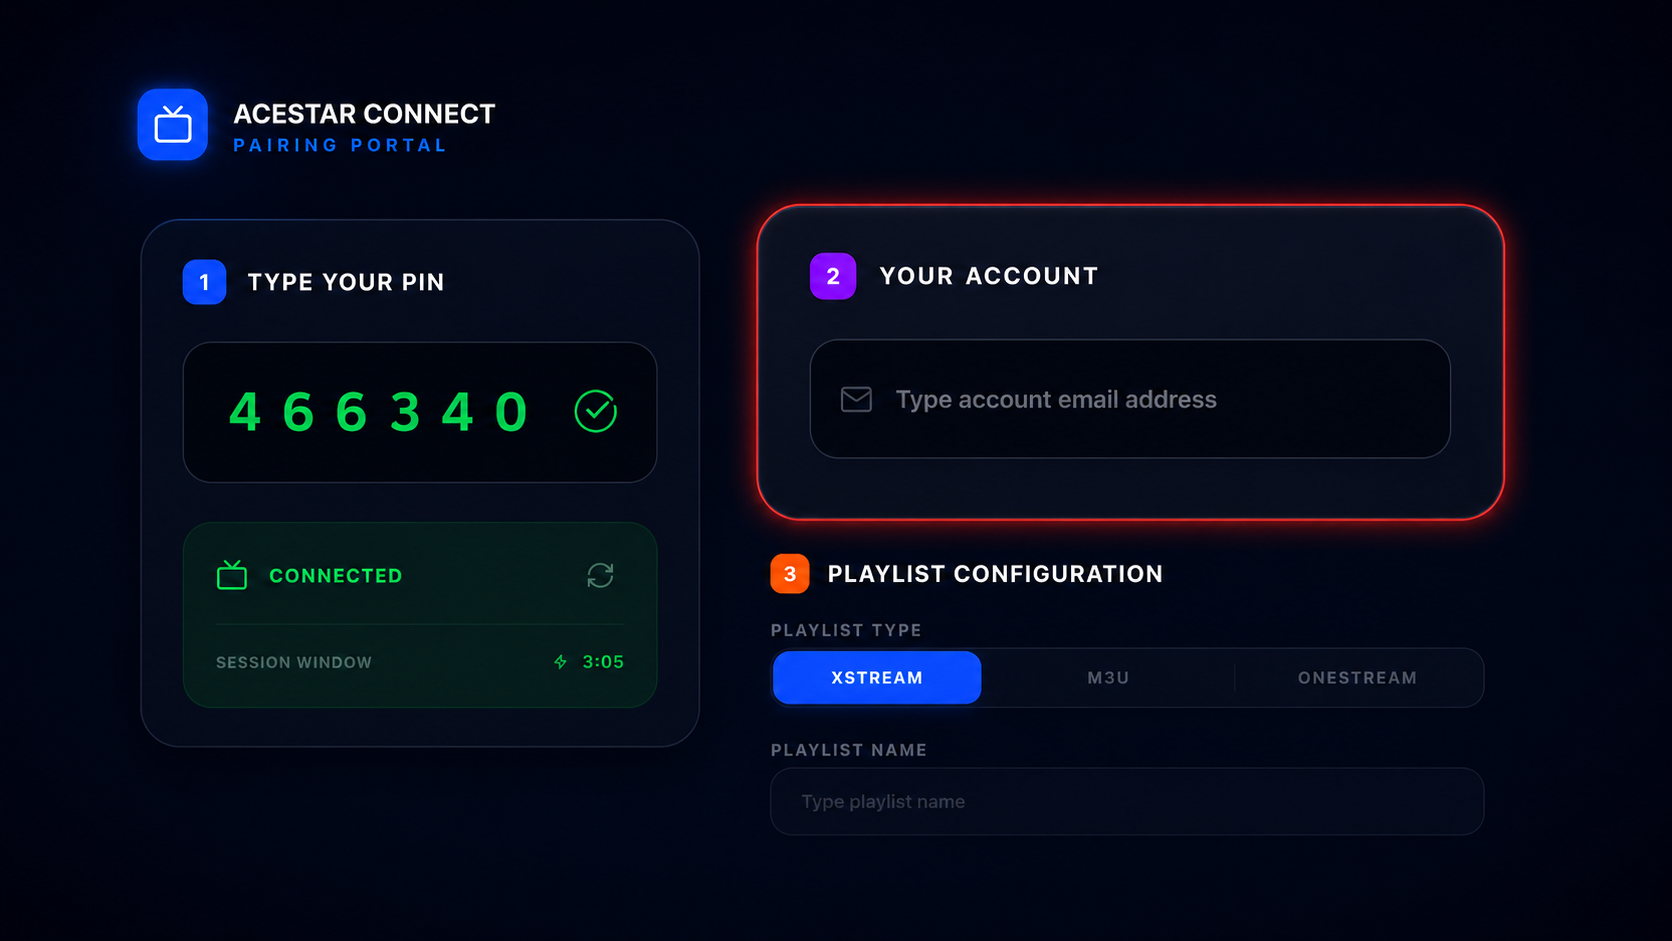
Once your device is successfully connected, move to the “Your Account” section.
Enter your account email address in the provided field to proceed further.
After entering your email address, make sure it is correct. If your account is already registered, it will be shown as an existing member.
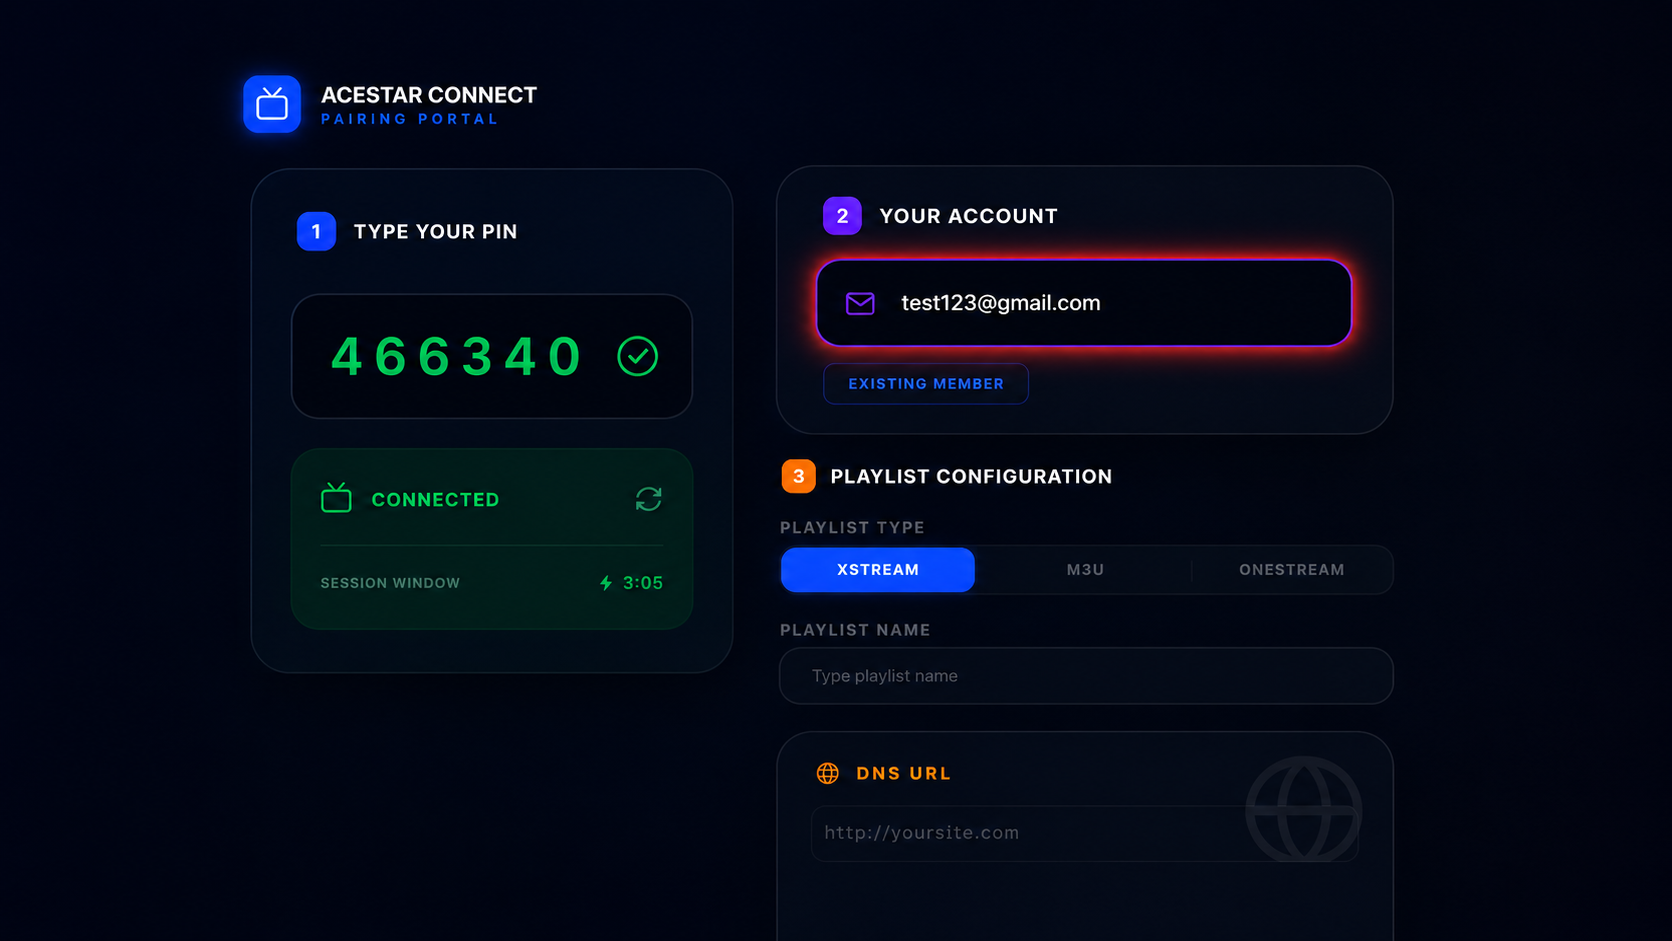
In the Playlist Configuration section, enter a name for your playlist. You can type any name (for example, Test, My Playlist, Live TV, etc.) to identify it easily later.
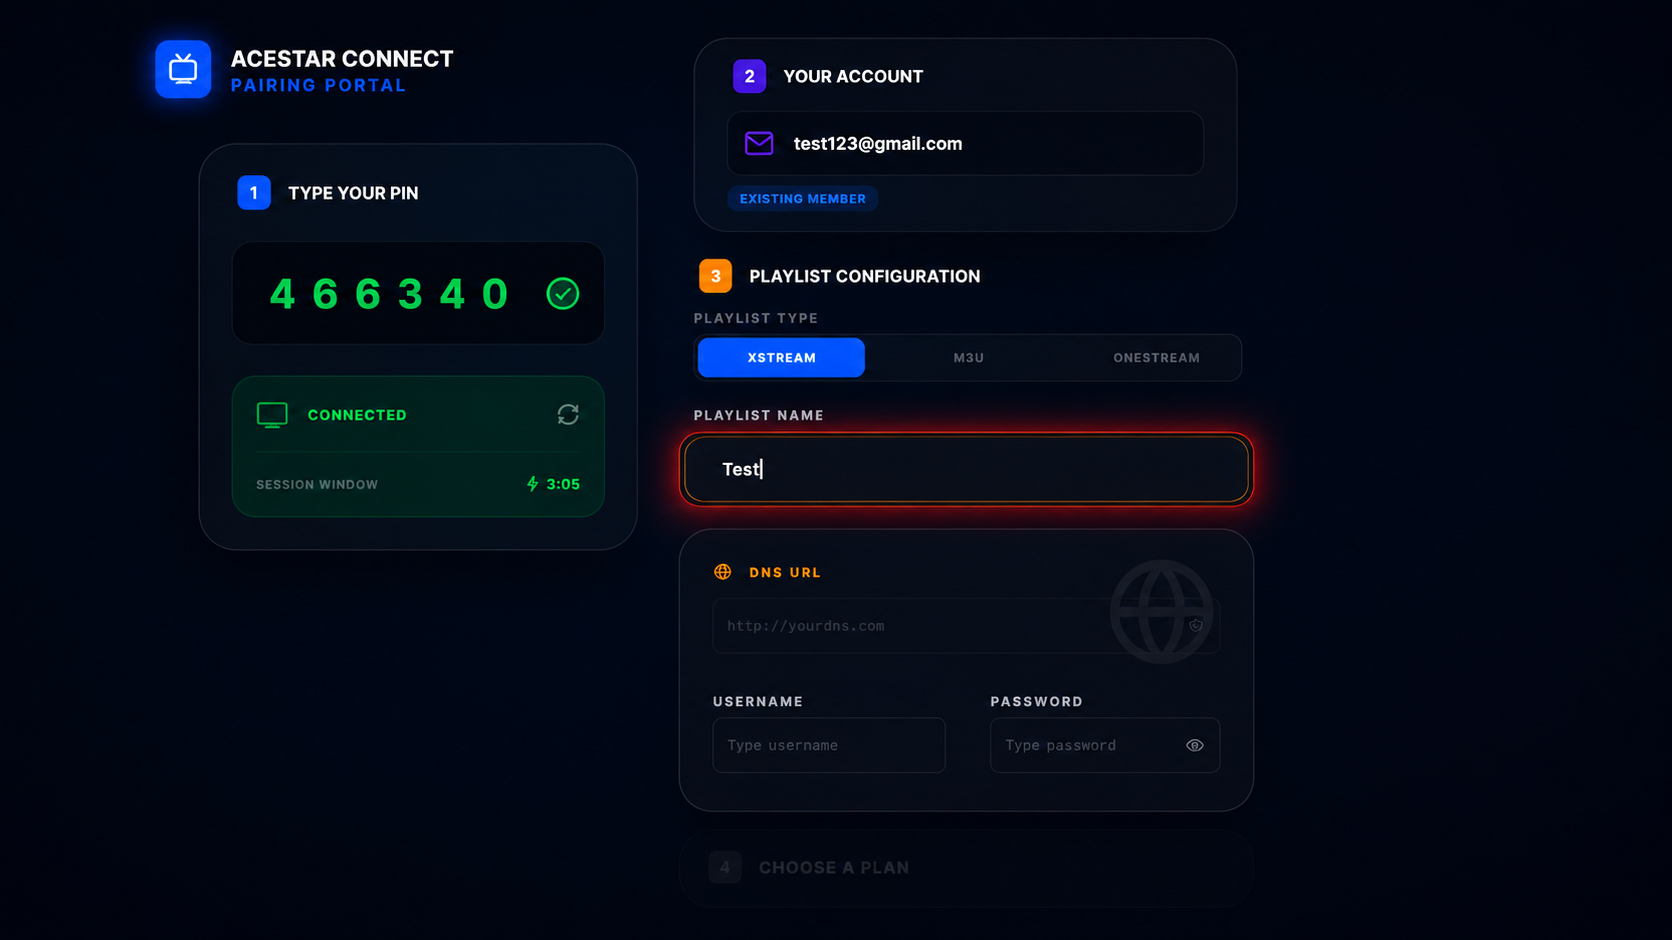
In the DNS URL section, enter the required details provided by your service provider:
DNS URL → Enter the server URL (for example: https://test.xyz)
Username → Enter your assigned username
Password → Enter your password
Note: Make sure all details are correct before proceeding.
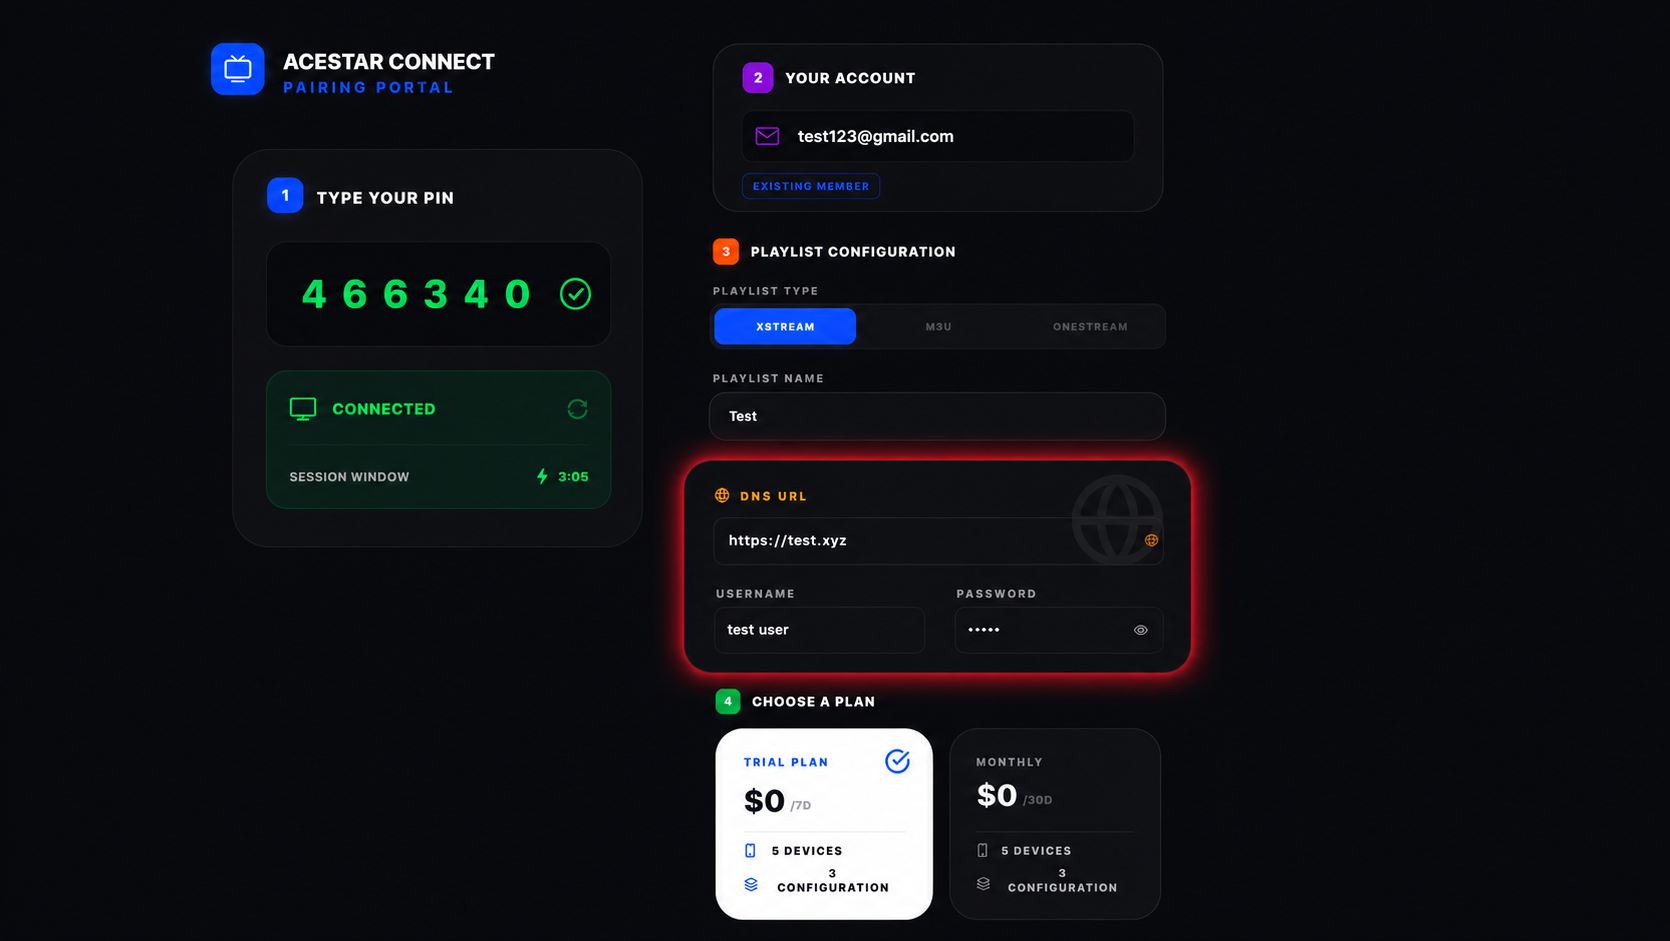
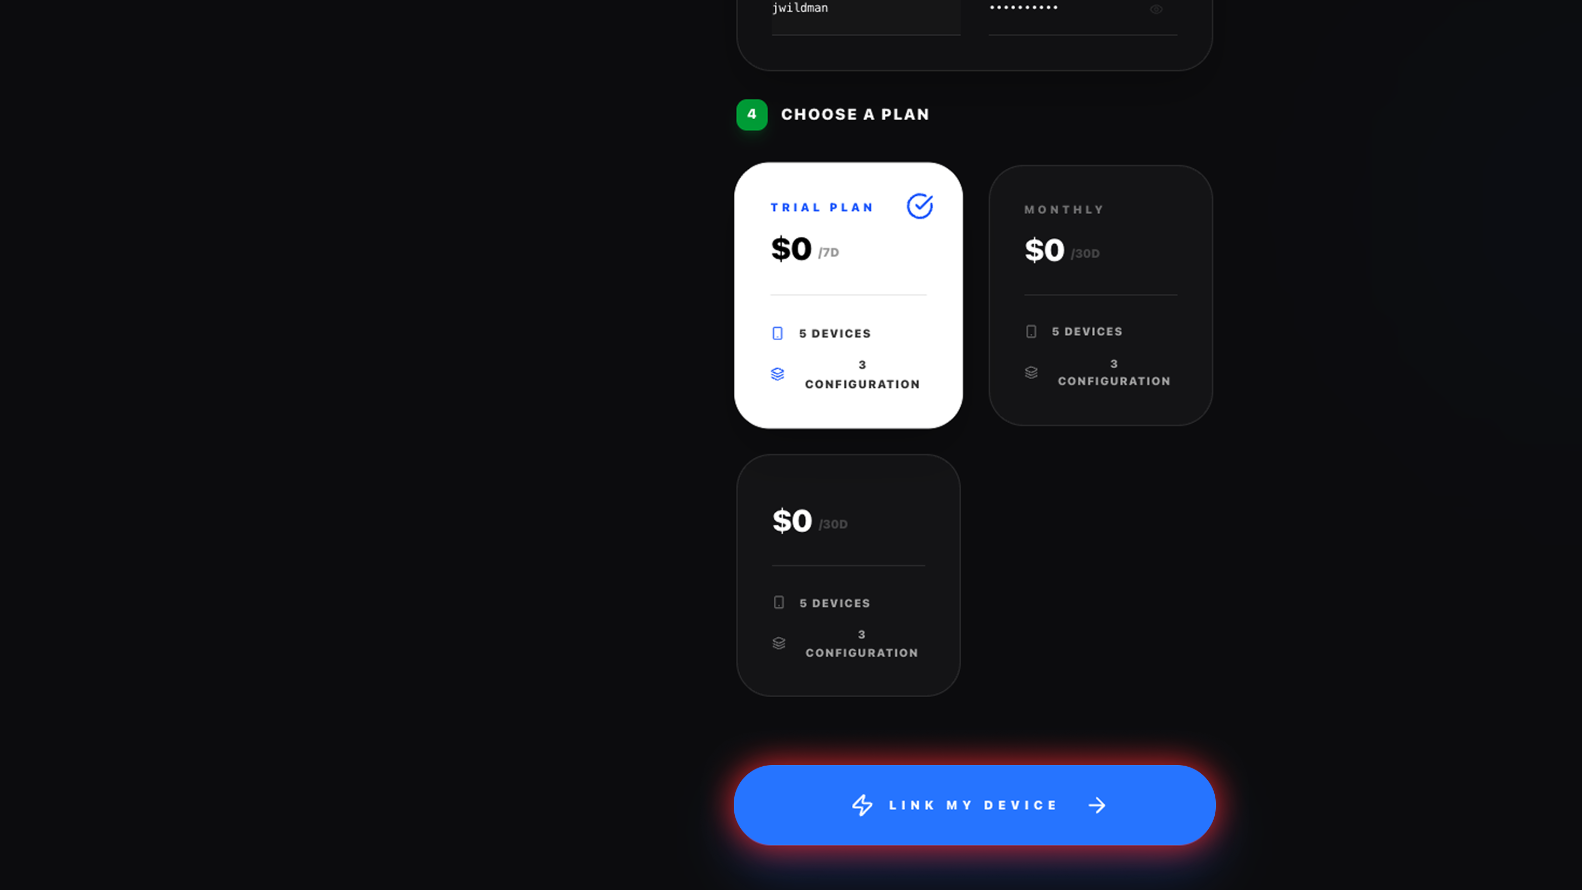
Click on your preferred plan.
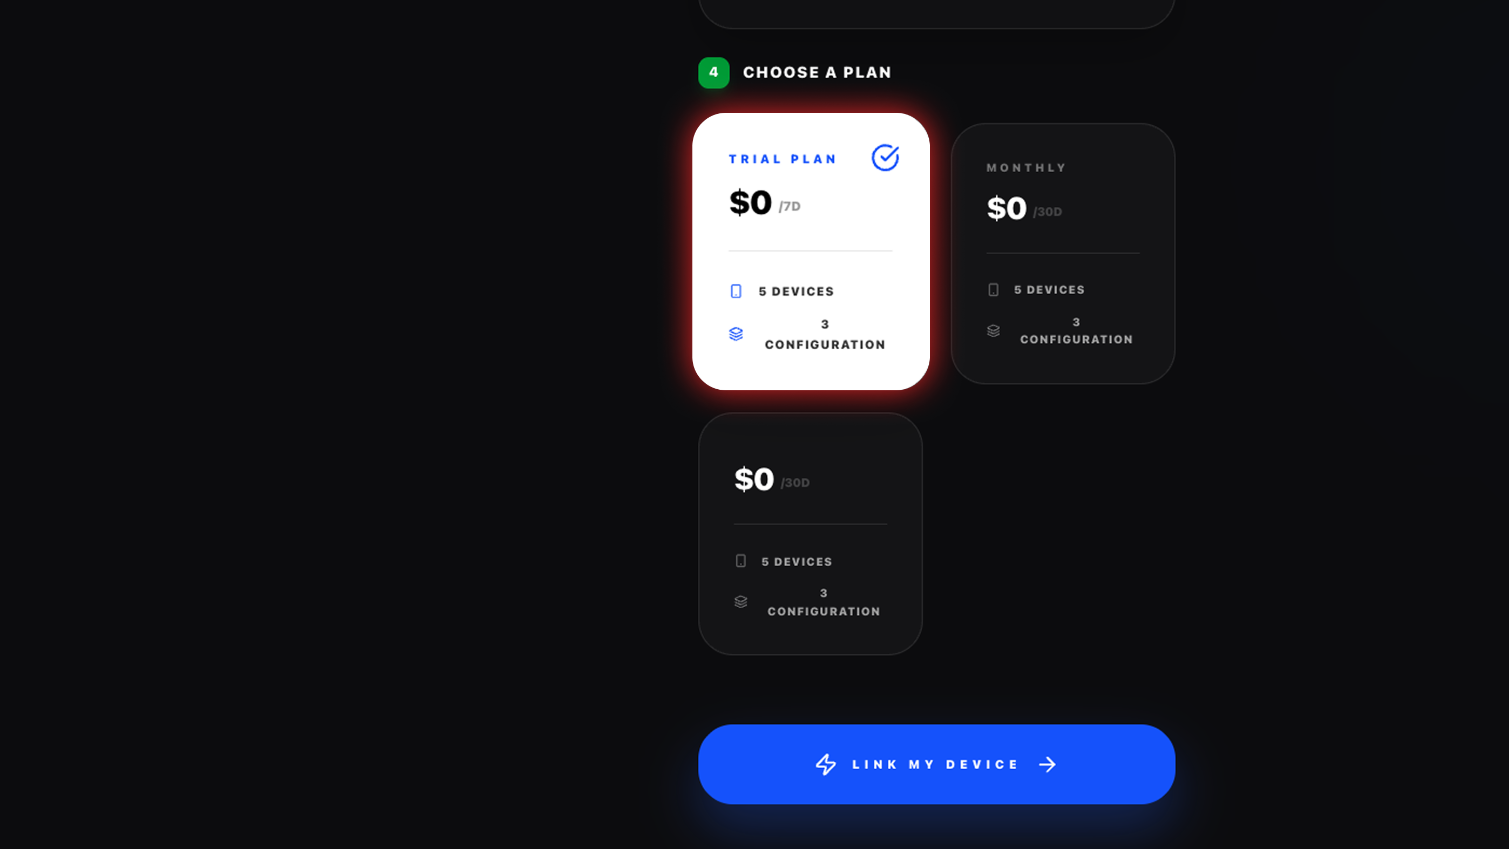
Click on the “Link My Device” button
This will connect your device to the playlist
Your setup will be completed instantly
Once you complete the linking process, you will see this confirmation:
Your PIN is verified, and the device shows as connected
The screen displays "Activated," confirming successful setup
Your device is now linked to your account (email shown on screen)
You can also click “New Pair” to connect again to the device.